
Use Route 53 Resolver DNS Firewall to help secure egress traffic…
What Is Route 53 Resolver DNS Firewall?
Route 53 Resolver DNS Firewall is a highly available, fully-managed service/firewall that leverages domain lists and rule groups to provide an additional layer security for outbound DNS traffic. It enables granular control over DNS querying behavior within your VPCs by blocking DNS queries for known malicious domains or allowing queries for trusted domains.
- A domain list is simply a list of domains to be used within a DNS firewall rule group.
- A rule group are a set of rules used to ALLOW, BLOCK, or ALERT on DNS request(s) that match its assigned domain list
Enabling Route 53 Resolver DNS Firewall
Here are the basic steps to enable Route 53 Resolver DNS Firewall.
- Create a Domain List
- Create a Rule Group
- Associate a Rule Group with a VPC(s)
- Verify Results
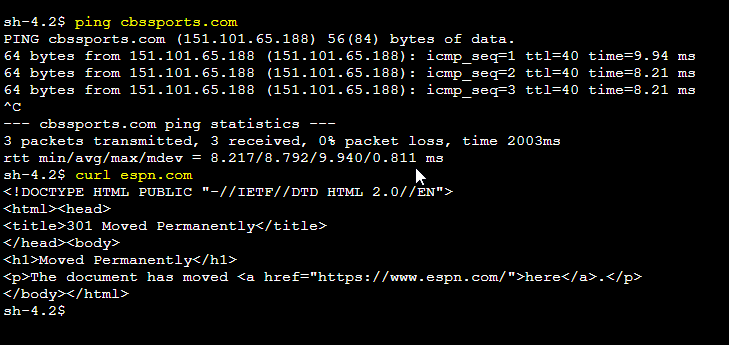
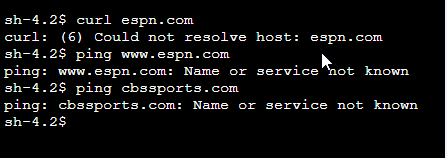
In the example below, I’ll cover the basic steps to block DNS queries to espn.com and cbssports.com. Here’s a screenshot from my test system prior to configuring the DNS Firewall:
1. Create a Domain List
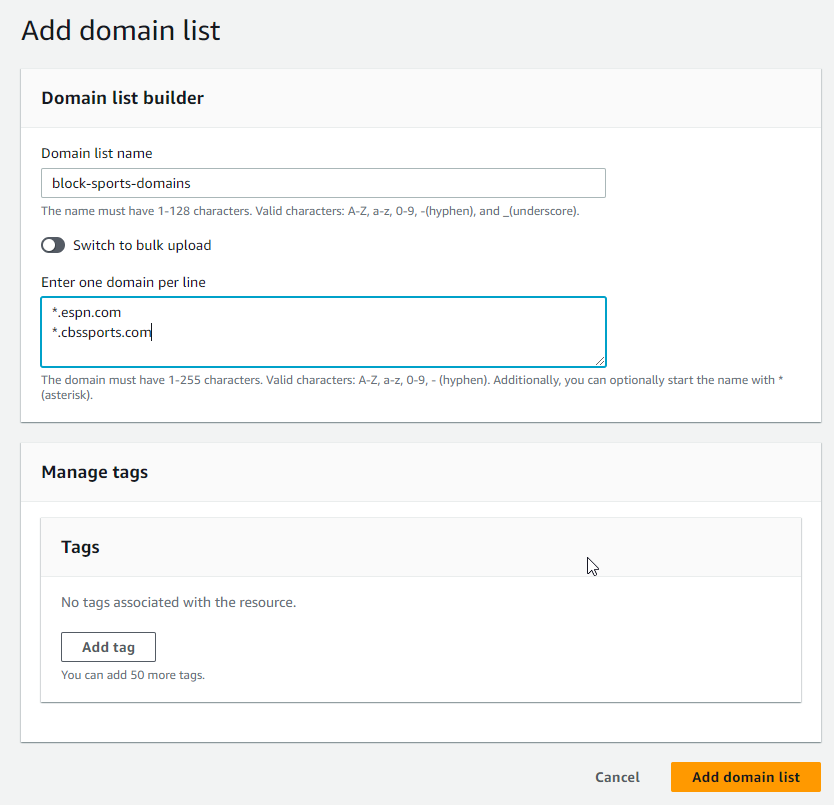
As stated previously, a domain list is nothing more than a list of domains. In this example, I’m going to create a domain list that includes espn.com and cbssports.com.
- Within the AWS Console, open the VPC console
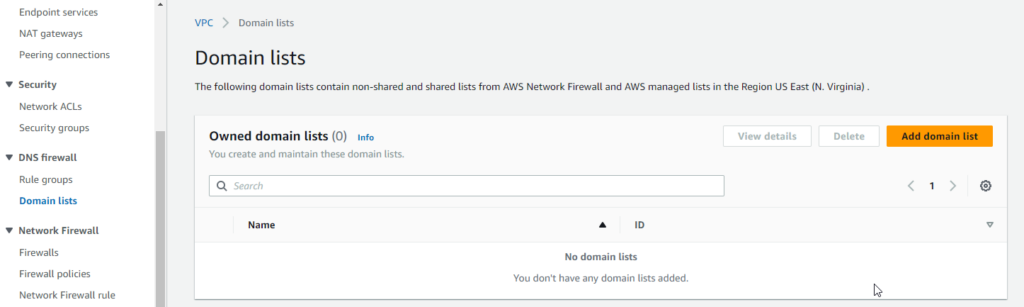
- Under the DNS Firewall heading, click Domain lists | Add domain list
- On the Add domain list page, enter a Domain list name, the desired domains, your preferred tags, and click Add domain list.
- **My domain list ended up with (4) entries. I had to add entries for espn.com and cbssports.com as well as the (2) entries below allowed me resolve the root domain for curl and ping. If I kept espn.com and removed *.espn.com, I was not able to curl or ping espn.com, but I could resolve www.espn.com.**
2. Create a Rule Group
- Within the AWS Console, open the VPC console
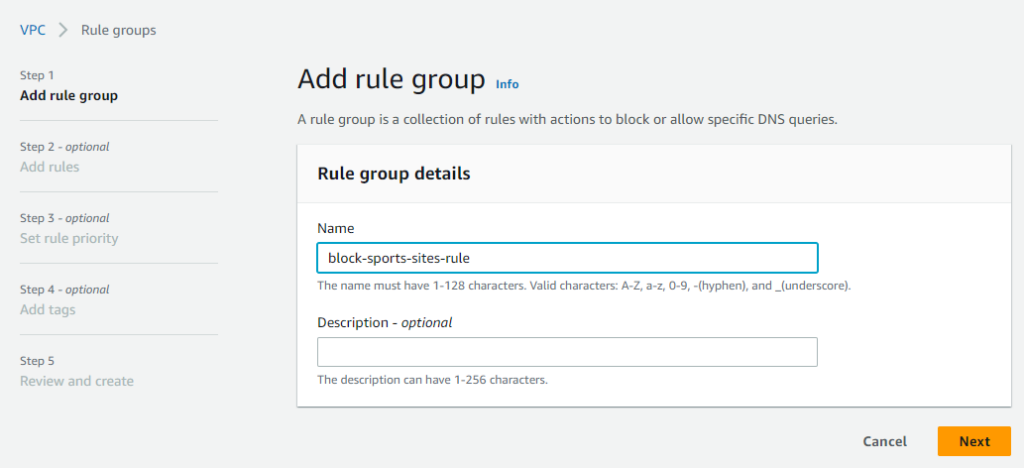
- Under the DNS Firewall heading, click Rule groups | Add rule group
- On the Add rule group page, enter a Name and Description for the new rule group and click Next
- On the Add rules page, click Add rule
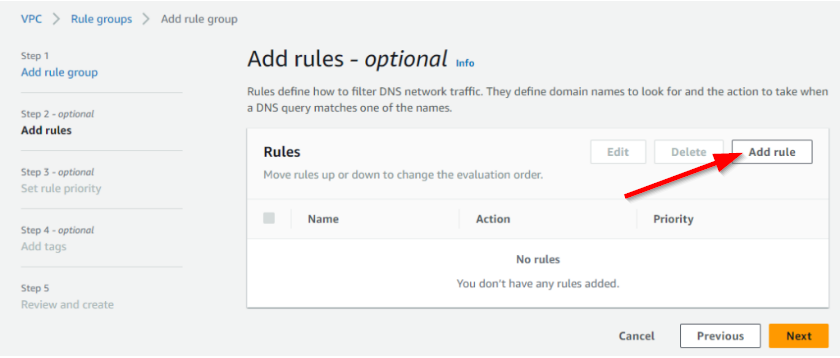
- Forgive the weird display of the screenshot, but on the second add rules page, we will do the following the following:
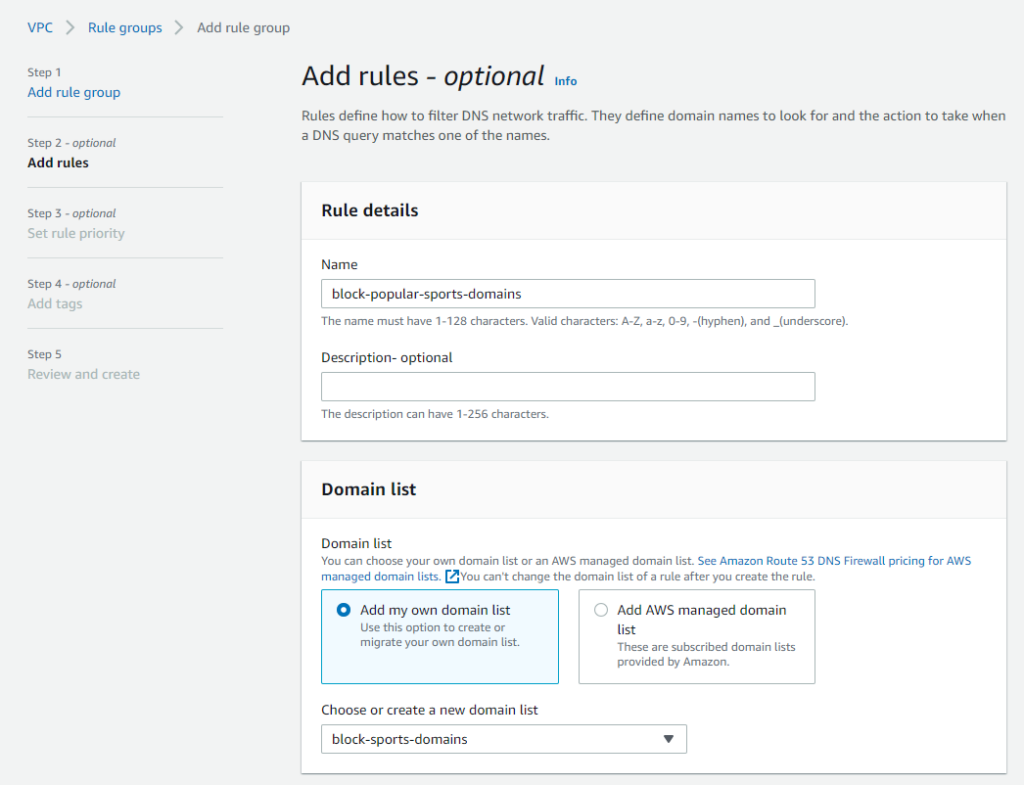
- Enter a Rule details Name
- Select Add my own domain list and then select the block-sports-domains domain list previously created
- Under the Action heading, select the action to take. In this example, I selected BLOCK
- Select the appropriate BLOCK response for your use case. In this example, I select OVERRIDE and set “sports-sites-are-blocked” as the response. For the Record Type, CNAME is the only option available in this case.
- Click Add rule

- When returned to the first Add rules page, you could click Add rule to add additional rules using either your own, or any of the AWS-managed domain lists. A single rule group can consist of multiple rules using a combination of custom or managed domain lists. When all required rules have been added, click Next.

- On the Set rule priority page, specify the order that DNS Firewall uses to evaluate the rules and click Next.
- On the Add tags page, use any tags relevant to your environment and click Next.
- On the Review and Create page, click Create rule group
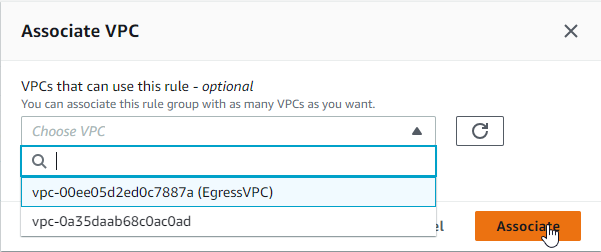
3. Associate the Rule Group with a VPC
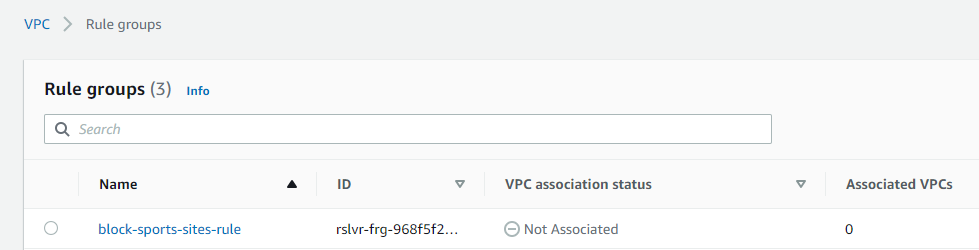
- Now that the rule group is created, it must be associated with a VPC (or multiple VPCs). If a rule group is not associated to a VPC, its status will read “Not Associated” as shown below:
- Select the rule group, then click Associated VPCs | Associate VPC
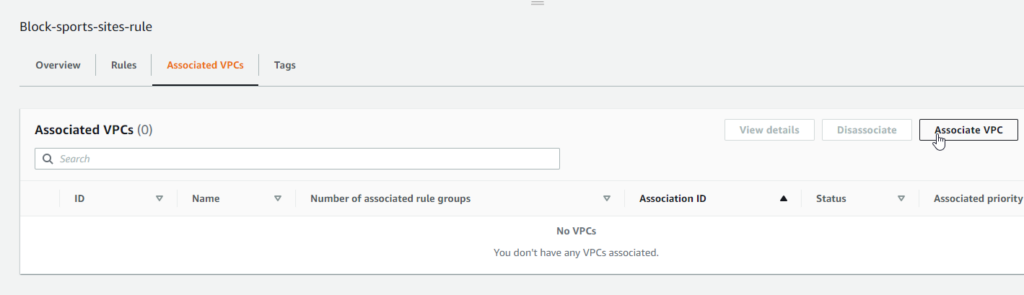
- On the Associate VPC screen, select the VPC you wish to associate with the rule group and click Associate. It may take a moment, but you’ll see the VPC association status change from Updating to Complete. You are now ready to test the rule group.
4. Verify Results
With the association complete, we’re ready to test. Try a curl and/or ping to ESPN and CBSSports. If we’ve done everything right, both should fail!
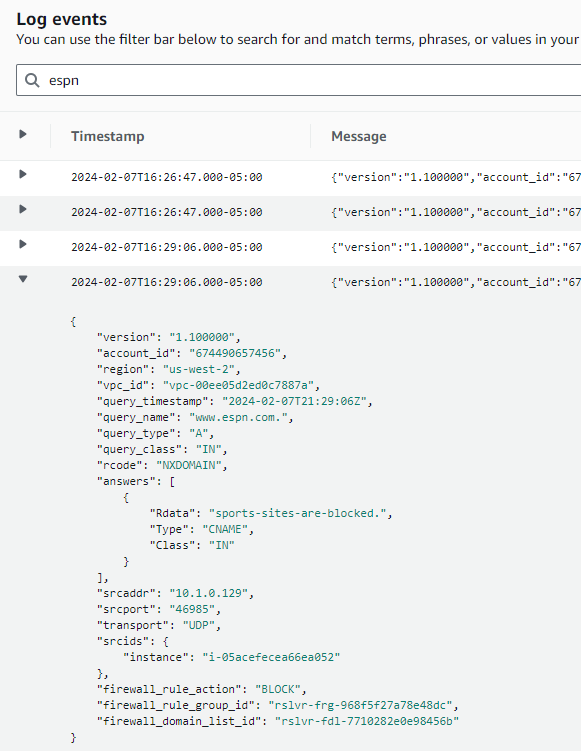
If you have Route 53 Query Logging enabled and configured to send its data to CloudWatch Logs, you can dig into specific events should you want or need to.
Conclusion
Though I’ve shown only a basic example of what can be done with the DNS Firewall, be assured, it can integrate with other AWS services such as GuardDuty and AWS Firewall Manager. Route 53 Resolver DNS Firewall enhances egress security by acting as a protective barrier, evaluating DNS requests as they leave your VPCs to ensure they are in alignment with your security best practices. By following the steps detailed in this post, you can enhance your security posture and protect your AWS environment from potential threats.