
At this point in the AWS WorkSpaces series, I have created my own image bundle, deployed and tested AD-joined WorkSpaces, and have setup Liquidware ProfileUnity to save user settings. Now, I want to add applications to my WorkSpace BUT without actually installing them onto my WorkSpace. How can one add an application to a machine without installing it? I’m glad you asked and I’m pleased to tell you that Liquidware FlexApp makes this possible.
Application Layering
I’m going to assume that you are at least familiar with the idea of application layering but just in case, application layering was technology introduced as a means to lessen the complexity of managing applications and gold images by decoupling applications from an underlying operating system. What? OK, so on a “clean machine”, applications are installed and packaged into layers that are then attached to machines by your preferred application layering vendor. Clear? Maybe not, but perhaps I can share an example.
I had a customer years ago that deployed VMware Horizon throughout the organization, about 125 virtual desktops to start. To support all the various use cases, they needed 12 gold images. Initially you think, 12 gold images is better than 125 individual desktops but after some time, managing 12 gold images became a chore nobody cared for. Consider…though there were 12 use cases that resulting in 12 gold images, some applications, such as Microsoft Office, used common settings throughout the organization but whenever an Office update was installed, 12 gold images had to be updated and 12 desktop pools had to be recomposed. This process took some time and became quite frustrating and they began to ask if there was a better way to manage virtual desktops? Is there a way to reduce the number of gold images we’re managing? If not, we’re ready to rip out VDI and go back to physical desktops! Enter application layering…
Being years ago, we implemented Unidesk and to me at least, the process of building desktops became akin to building a house with Legos. With layering, we were able to breakdown (that may be a poor choice of words) the desktop environment into its most basic components. If you imagine your desktop as a Lego house, the OS layer would function as the green Lego base, the foundation on which the house is built and the application layers would serve as the building blocks and since layers are so versatile, you can use the same identical application layers to create vastly different desktops to meet diverse user needs though using a single base image. To illustrate how this makes life easier for IT, let’s consider the Office example from above. With application layering implemented, I simply update the Office application layer, attach it to the machine(s) requiring the update, and then reboot the machine(s). Notice I did not have to update Office 12 times on 12 gold images, in fact NOTHING was done on the base image. Also, there is no need to recompose desktop pools and wait for what seemed like an eternity for that process to complete.
Why FlexApp?
I have and continue to work with Unidesk/Citrix App Layering and VMware App Volumes but the more I looked at FlexApp, the more impressed I became. First, FlexApp offers “PackageOnce” capabilities, meaning application layers created with it work across multiple Windows OS versions. Second, I wanted minimal infrastructure to support the environment which means I didn’t want to deploy a SQL server. Third, I had a “gut feeling” that FlexApp is the best application layering technology for AWS WorkSpaces since I can easily integrate ProfileUnity with S3 today and very soon, FlexApp will support S3 for application layers….maybe by the time I actually finish this post. 🙂
Deploying the FlexApp Packaging Console
To deploy FlexApp packages (or really any package using App Layering) you need to build a “packager”. The packager is simply a virtual machine on which you build your application layers and ideally, though not mandatory for FlexApp, the OS of this VM should match the OS of the VMs you will publish to end users and it will be as “clean” as possible, meaning don’t load a bunch of apps on it. For this purposes of this post, I built a Windows 10 packager VM on my VMware infrastructure on which I installed the OS, OS updates, and the FlexApp Packaging Console. I did not join the packaging VM to the domain initially but having deployed a few FlexApp packages, I believe it to be a good idea if you’re going to save FlexApp packages to Windows-based file shares.
The FlexApp Packaging Console is a pretty straightforward Next, Next, Finish type installation so I will no bore you with its screenshots but will tell you that you download the installation executable via the ProfileUnity Administration page. Click the Download FlexApp Packaging Console link, copy the installation file to the packaging VM, and then run the installer on the packaging VM.

Once the installation completes, launch the FlexApp Packaging Console and when prompted enter the ProfileUnity URL as well as credentials for a user account with access to the ProfileUnity Management console. Additionally, I created a FlexAppPackages directory on the C: to support building FlexApp packages locally (without accessing a file share).

Once you verify the FlexApp Packaging Console opens, take a snapshot of your Packaging VM. You are now ready to create FlexApp application layers.

Creating a FlexApp Package
With the packaging VM ready to go, let’s look at the process of creating a FlexApp package for NotePad ++. Remember, always make sure your packaging VM is reverted to the “CleanState” snapshot before creating a FlexApp package.
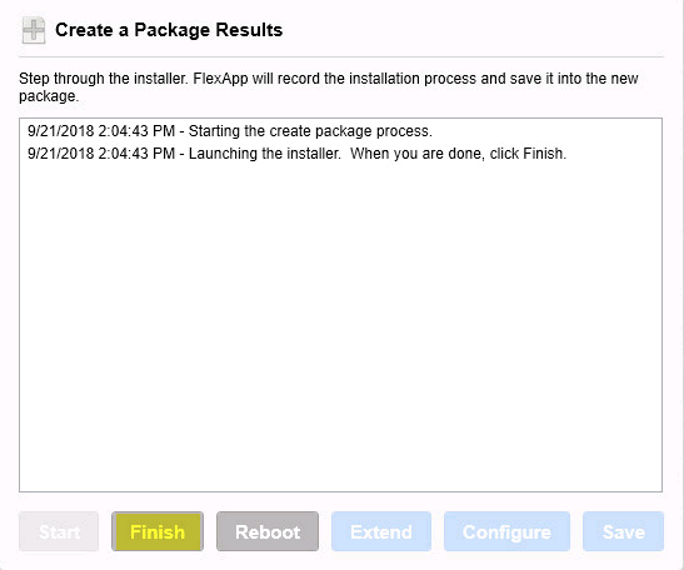
- Login to the Packaging VM and open the FlexApp Packaging Console. Click Create.

- On the Create a Package screen, enter a Package Name and specify the Installer Location. In this specific instance, I chose LocalDisk as my Package Type because my non-domain member packaging VM did not have access to the Windows-based file share I created to serve as the FlexApp repository. This created a little extra work for me later but ultimately my desire to put store FlexApp packages on S3 so I’m hoping domain membership becomes unimportant. Click Create to launch the specified installer.

- When able, install the application. Generally speaking, you shouldn’t have to change the way you install an application to work as a FlexApp layer however, some applications such as Microsoft Office, do have specific optimization steps. In terms of FlexApp packaging, check the Liquidware support site to search for any specific steps that may be required for your application.

- When you have finished installing and testing the application, click Finish to complete the package creation process. When that process completes, click Save.

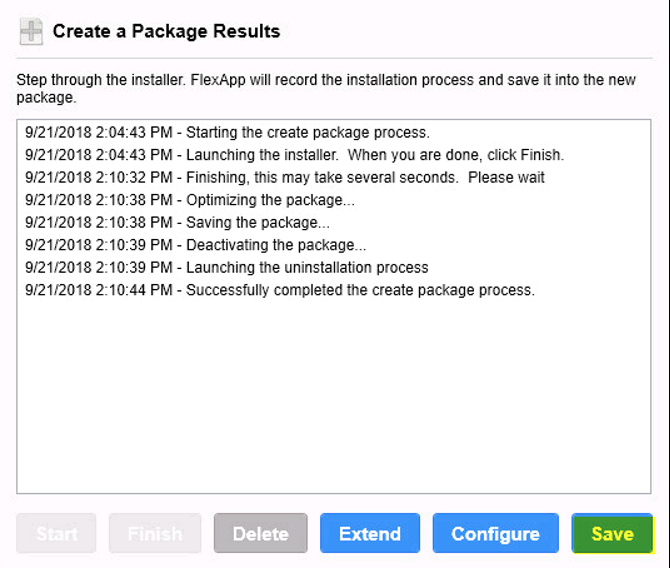
- The NotePad++ package is now visible in the Package Inventory and is ready to be assigned using the ProfileUnity management console.

NOTE: Because I used a non-domain member, I had the additional step of cloning this package to a VHD using the FlexApp Packaging Console that I installed on a VM that was a member of the domain. Cloning allowed me to save the FlexApp VHD to a Windows DFS share.
Publishing a FlexApp Package
With the FlexApp package created, we can now assign it to WorkSpaces using the ProfileUnity management console.
- Login to the ProfileUnity management console and on the Edit Configuration screen, click FlexApp DIA

- On the FlexApp DIA screen, click Add FlexApp DIA Rule.

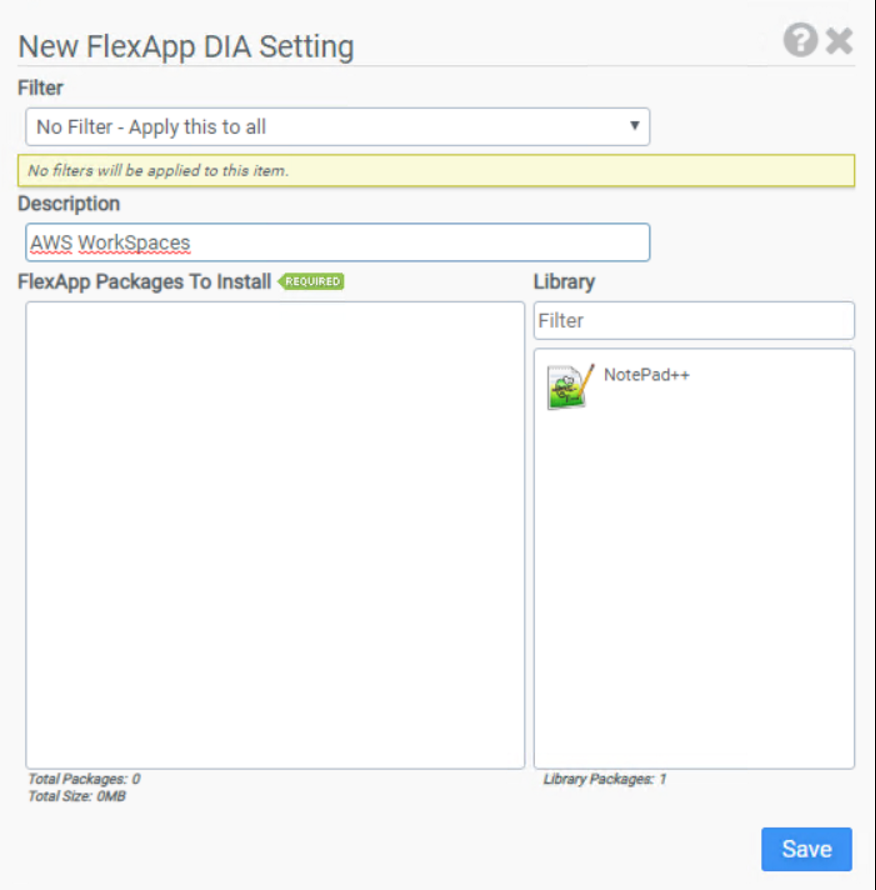
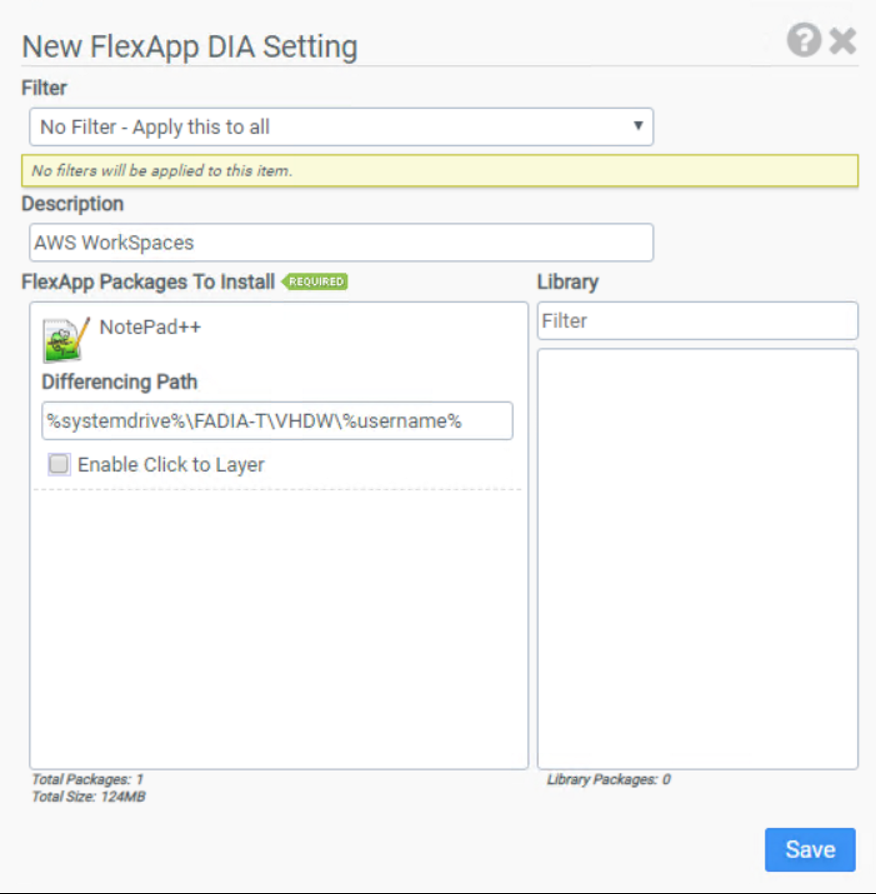
- On the New FlexApp DIA Setting screen, drag the FlexApp package you wish to publish from the Library to the FlexApp Packages to Install box and click Save.
- When returned to the FlexApp DIA screen, click Update.

- In order for the newly assigned FlexApp to be accessible on an AWS WorkSpace, an updated configuration file must be deployed to the S3 bucket. On the Configuration Management screen, select the profile that has been updated to include FlexApp packages and click Deploy Configuration.

Notice that the configuration file that exists within the S3\Configuration bucket prior to deploying the updated file has no FlexApp entries:

- On the Deploy Configuration box, to save the updated configuration file to S3 select Cloud as the Platform. Within the Deployment Path, specify the S3 configuration bucket and click Deploy.

Notice that the new configuration file does include FlexApp data:
- Once the WorkSpace reads the updated configuration file, FlexApps added to the configuration file will be available within the AWS WorkSpace.


Conclusion
Having worked with several application layering technologies, I’ve been very pleased with FlexApp’s ease of use and when combined with ProfileUnity, Liquidware provides a customizable and feature-rich platform for managing the entire EUC experience, from user and computer settings to applications whether it be AWS WorkSpaces, VMware Horizon, Citrix Apps/Desktops, or even physical machines.
To read more about application layering in general, consider the following posts:
Application Layering Bake-Off Results
What’s the State of Application Layering in 2018?
WhatMatrix Application Layering Comparison