
I had a Citrix App Layering (formerly Unidesk) customer ask me recently if there was an easy way to display or determine the OS layer version of a given virtual desktop from within vCenter. Prior versions of CAL/Unidesk 2.x “built” the virtual desktops itself, meaning it did not rely on Horizon tools like Composer to build virtual desktops, thus objects for each virtual desktop built by Unidesk were displayed within the Unidesk Management Console. The OS and Application layers assigned to a given virtual desktop could be easily determined with a quick search for the desktop within the UMC.
With CAL, the building of the virtual desktops in a Horizon environment falls back under the authority of View Composer or Instant Clones and so virtual desktop objects are no longer seen within the UMC which means it cannot be used to display the OS, Platform, or Application layers used to build a virtual desktop. So, how can an administrator look at a virtual desktop and easily determine what layers are present on a given virtual desktop?
I contacted Citrix support to see if there may be some way to extract this information or if there exists a “secret” registry key that contains layer information and maybe we could use bginfo to display it on the users’ desktop but was told this, “Currently there is not really a way to see this from a VM made from an app layering image.” Certainly I could use View Administrator to look at the snapshot used by the desktop pool, open the CAL interface, and then find and review the appropriate image template. But who wants to do that? (though it may ultimately be necessary)
Using VMware PowerCLI to add VM Notes
Because I have not been able to think of any other way, I decided to use VMware PowerCLI to add Notes to a VM.

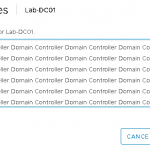
Before I started, I wanted to see if the Notes panel within vCenter had a character limit and though it may have one, in true Jack Torrance style, I copy/pasted Domain Controller over 200 times into the Notes panel and upon clicking OK I received no error.
NOTE: In this tutorial, I executed the VMware PowerCLI commands from a Windows 10 computer and the vCenter server in my lab is a 6.5 virtual appliance. If your configuration does not match that exactly, you may find that the steps you take are not an exact duplicate of the steps shown below. For example, if you are running PowerCLI from a Windows 7 computer and your vCenter Server is running on Windows, you’ll likely have to manually download and install the VMware PowerCLI on your administrator computer AND you may need to adjust the vCenter Servers PowerShell ExecutionPolicy (Set-ExecutionPolicy) to RemoteSigned for the PowerCLI commands to work.
- To add notes to Horizon VMs, start by creating a CSV with 2 columns (VMName and Note). Under the VMName heading, enter the VM display names as seen within vCenter and under the Note heading, type the desired note. In this example, I’m just filling in the note with the CAL Image Template but this Note can have whatever you want in it since there appear to be no character limits. Once completed, save the file as a CSV. On my machine, I saved it to the C:\Temp directory as testnotes.csv.

- Launch/Run the PowerShell console as Administrator. To install the VMware PowerCLI, execute the command Install-Module -Name VMware.PowerCLI. When prompted that you are installing modules from an untrusted, type Y and press <ENTER> to continue.

- Because I am using self-signed and my computers point of view, an untrusted vCenter certificate, I needed to adjust PowerCLIs behavior and have it prompt me to accept untrusted server certificates using the command Set-PowerCLIConfiguration -InvalidCertificateAction prompt.

- In order to run PowerCLI commands against it, a connection must be made to the vCenter server using a command similar to the following: Connect-VIServer -Server vCenterSrv/IP -User adminuser -Password adminpw.

NOTE: If the user account you specify has the ( character in its password, you will likely need quotes before and after your password for the connection to work. For example: …-User vsphere.local\administrator -Password “passwo(rd”
- To import the VM Notes into vCenter using the Import-CSV command using the following syntax: Import-CSV “C:\temp\testnotes.csv” | % { Set-VM $_.VMName -Description $_.Note -Confirm:$false}

- Open the vSphere web client to verify success.

Final Thoughts
I’m sure there is a better way to do this and if you have any, I’d love to hear them but at this time, this is all I have. Keep in mind the following:
- I also noticed that at times, my Import command would generate an error saying that a mandatory VM attribute couldn’t be located, yet the Note would apply as expected so keep your eye out for that.
- If any notes exist on a VM, and that VM exists within the import file, existing notes will be overwritten by those specified in the import CSV.
- In my mind, the biggest problem with this method is that its not automatic and as such is susceptible to error as an administrator may forget to update and import the CSV once a new image template has been deployed.